My ABCs for studio photography
Some "Do"s and "Don't"s for the studio
A - Aperture. Yes, f5.6 will save power and you'll think you are getting an artistic depth-of-field, but f8 will make the subject sharp
B - Bend arms and legs. Basically, the rule is: "If it bends, bend it. If there are two of them, bend them differently." This refers to the model(s) but it might not hurt to loosen up the photographer!
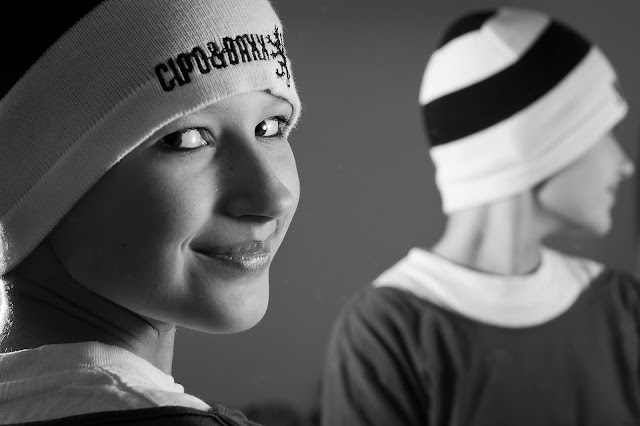
C - Catch light. That's the white reflection of the light in the iris of the model's eye. If the eyes don't catch the light, they look dead.
D - Dream your shots before going into the studio and making them. Write down the poses, the position of the lights, and the effects you want beforehand.
 |
| I dreamt of this motif the night before the photo session. |
E - Eyes. When we look at a picture of a person, we are drawn to the eyes first. Make sure that at least one (the near one) is sharp. The second thing we look at are the hands (see "H").
F - Fill the shadows with reflected light or a second light source unless you have a good reason to have harsh shadows.
G - Glasses present a problem because of the glare from the studio lights. Place the lights to the side to avoid glare and reflect soft light into the face. Or: Take two pictures - one with and one without glasses (and one with, one without flashes/lights) and photoshop the non-glare glasses back on.
H - Hands are interesting. Get the model's hands up around the face, in the hair, where they are visible. Give her something to play with using her hands.
H2 - A hairlight helps set the model's head apart from the background and gives the hair a nice shine. It doesn't have to be much, but it makes a big difference if it's there.
I - ISO settings should help you balance the shutter speed and aperture. If you shoot a model at 1/60 sec. all day, you're going to end up with lots of blurry pictures. ISO 400 will allow shutter speeds of 1/160 and f8 and I promise you won't have any noise. Go for it!
J - Just let the model have fun and you try to have fun and it will be an enjoyable experience. Let her know things are going well and act confident.
K - Know your camera. This is the first and great commandment. The second is like unto it...
L - It's not a photograph if there's no light. Think about it. Light is everything. Experiment with lighting effects but know the basics of what (parts of the face and body) you need to light.
M - Make pictures, don't just take them. Concentrate as much as possible on the details: background, hair, fill-light. It's better in the end to spend five minutes setting up a picture and getting one good shot than to shoot 30 pictures in five minutes and not get a single good one.
N - Never forget the rules from the letters in this list that make up your name. (It's a good place to start, anyway.)
O - Overexposure leads to blown out highlights that cannot be (easily) recovered in post-processing. Set your exposure for the highlights using spot metering.
P - A Pinnochio nose results when the model's face is turned to a 50°-85° profile and her nose extends beyond the line of her cheek. The nose then looks bigger than it really is.
Q - The Queen of England can be photographed from dead straight on and look like the strong monarch she is. Does your model have that kind of stature or does a slight turn look more attractive? (I'm taking bets on the latter.)
R - Raccoon eyes come as a result of the main light source being too close and high. Then you've got shadows from the eyebrows (and forehead bone structure) darkening the eyes.
 |
| The light source was too high, causing shadows on the eyes. |
 |
| The light source was placed correctly. |
 |
| Even with her face turned, we see the whites of her eyes on both sides of the irises. |
T - Texture the light. Instead of having it bounce straight off the model, make it graze the skin, showing the body's texture.
U - Underexposure results in black clipping. Like the overexposed parts, these cannot be recovered in post-processing. Even in low-key photography, the gray-to-black area should ideally consist of a number of shades.
V - Vary positions, both yours and that of the model. However, remember that most models do not look their best when you are accentuating the mass of their thighs and looking up their nose.
W - The waist is often a sore spot, but did you know that it bends? Twist to the side and the hips and waist seem to disappear (or at least become slimmer). Have the model bend forward to get the chest results...uh "best" results and to help eliminate a double chin.
X - Experiment in your free time and watch others while they are shooting. When it is your turn with the model, you should have a plan.
Y - Yield to your first instinct.
Z - Zoom in from a distance and use 70-200mm rather than getting up close and using a wide-angle lens: it will make the model appear slimmer (if that's what you want).
 |
| 45mm |
 |
| 157mm |


